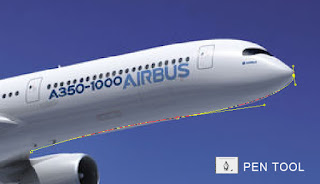
So, now you know Pen Tool, know how to work with Layers and it's time for Feather Radius. Feather Radius is also an interesting tool of PS. We use this when we want to create a transparent object. We call it Cut-Out in publishing line. Means we want to remove background and want Aeroplane (see image below).
Now, we will find out that how can we use Feather Radius for better designs. For that we open any image or photograph in PS and make a selection with the Pen tool.
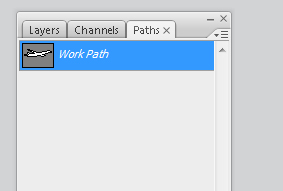
After completing selection we go to Path Panel (showing in the image below) and right click on the path.
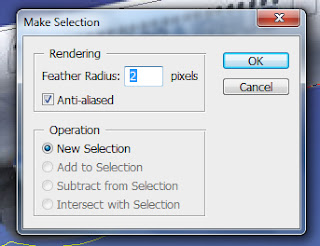
Now we click on the Make Selection and we get Make Selection Window as shown in the image below. Here we set the radius of selection. Now click OK and your selection is done.
All is done, now time to copy this object and paste in different file. You have save this file in default format as .psd or save in different format too as .png, .tiff, .jpeg, etc..
There might be some difficulties doing this. And please if you have any problem doing this then write your problem/issue/error in comment and I will create a tutorial especially for you.
Thanks for your time…
I have created this background (Cloud design for World Monuments Collage) by using Photoshop's Cut-Out method. Share your designs...

Now, we will find out that how can we use Feather Radius for better designs. For that we open any image or photograph in PS and make a selection with the Pen tool.

After completing selection we go to Path Panel (showing in the image below) and right click on the path.

Now we click on the Make Selection and we get Make Selection Window as shown in the image below. Here we set the radius of selection. Now click OK and your selection is done.

All is done, now time to copy this object and paste in different file. You have save this file in default format as .psd or save in different format too as .png, .tiff, .jpeg, etc..
There might be some difficulties doing this. And please if you have any problem doing this then write your problem/issue/error in comment and I will create a tutorial especially for you.
Thanks for your time…
I have created this background (Cloud design for World Monuments Collage) by using Photoshop's Cut-Out method. Share your designs...


Clipping Path provides Photoshop Services and many more like Background Removal Services
ReplyDeleteAwesome expected post you shared here, I will require it many times, and here the outstanding selection of topic also makes me more jolly, please hope more blog post we get from you.
ReplyDelete