
CorelDraw is a unique desktop publishing software, with this you can design anything you want for print and design. Here we start with a new document, this is very first tutorial to teach you about creating a CDR file. You should practice it while reading the tutorial. Open your software and start doing this.
Step 01: Open the software does not matter which version you are using (12 13 14 15). Now go to File > New or press Ctrl+N to create a new document. Name: Give a file name as you want. Give a proper name that you can recognize it by it’s name. Preset destination: Remain it custom or if you working for web projects change it to Web. Size: There are different sizes you can use. Choose according to your need or let it Full Screen. Width: Set width of document, you can change the units to inch or points. Height: Set height as you want. Rendering resolution: Let it default. Do not change the color settings. Now, press OK and a blank document will show to you. Step 02: Time to setup a margin for the document. Margin : We leave some space on the top, bottom, right and left of the page. Normally we leave .5inch margin on each side. Click on the ruler (shown in the image below) and drag a guideline for margin. Give .5inch margin on each side. 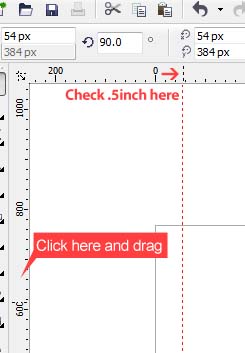 |
| Setting-up guidelines for Margin |

Now, our layout is ready. Time to put text, objects, images on it.
Time to see step 02 for this…
No comments:
Post a Comment